Thursday, December 29, 2011

Best Beef Dip! - for a slow cooker


Beef Dip is one of those recipes that I always order at a diner.  I love it.  It's a treat when made well, but I've never thought to make it myself.  Rewind to two weeks ago, I was browsing at one of my favorite recipe sites, food.com, and found this recipe.  It had very high ratings (4 1/2 stars out of 5) and a lot of positive reviews.  The ingredients were simple and staples in our home.  It looked super easy (and it was) and honestly, I couldn't believe how delicious this really was.  My husband has not stopped talking about it ever since.  He has asked a number of our friends if they have slow cookers and told them to get this recipe off of me.  That's high praise :)  The original posting is found here: http://www.food.com/recipe/french-dip-roast-beef-for-the-crock-pot-103403.
  • 3 1/2-4 lbs boneless chuck roast
  • 1/2 cup soy sauce
  • 1 beef bouillon cube
  • 1 bay leaf
  • 3 -4 peppercorns
  • 1 teaspoon dried rosemary , crushed
  • 1 teaspoon dried thyme
  • 1 teaspoon garlic powder
  • 12 French rolls , split - (even better when toasted and then spread with a little mayo before adding the meat)

Place roast in a 5-quart slow cooker. Combine soy sauce and next 6 ingredients.  Pour over roast.  Add water to slow cooker until roast is almost covered.  Cook, covered, on LOW for 7 hours or until very tender.  Remove roast, reserving broth.  You may shred roast with a fork and serve on sandwich rolls with the broth on the side for dipping.


  • Sunday, December 4, 2011

    The Best Pizza Dough and Pizza Sauce!

    When we were living in Toronto we made some fantastic friends.  We met through work (the man being my husband's boss) and were invited over for lunch out of politeness to get to know each other better.  I had to laugh later on as both couples afterwards had the same conversation of, "those guys seem really cool, I hope we get to know them better" and over the next year and a half we did.  Both families love to cook so we spent a lot of meals together.  One of their standards was their home made pizza.  They make a lot of dough and put out a wide variety of toppings and everyone just goes for it creating.
    Since we moved to where we are currently living, I've made home made pizza a couple of times, but it just wasn't the same.  So I emailed Tiffany and asked for her pizza dough recipe.  Tonight we made it and this is it.  This is simply the best pizza dough recipe.  It turns out so well.  The dough rises really nicely and it crisps up well on the crusts.  I paired it with a pizza sauce recipe I found on All Recipes.  It has a 4.5 star rating and I can see why.  It's tasty and a great consistency.
    We made 2 pizzas tonight.  The first was the kids' basic cheese.  The second was a little more adventurous (and perfectly delicious).  Half was fig and goat cheese.  The other half was shrimp, sun-dried tomato, onion and feta cheese.  I couldn't pick a favorite, just delicious.

    Pizza Dough

    1 tablespoon yeast
    3 ½ C flour
    1 teaspoon salt
    2 tablespoons olive oil

    1.       Pour ½ cup warm water in a measuring cup.  Stir in the yeast and let it stand until dissolved and creamy, about 5 minutes.

    2.       In a large bowl, combine flour and salt, make a well and fill it with the yeast mixture.  Add olive oil and 1 cup of warm water.  Stir until a rough ball of dough forms.  Turn out of bowl and knead until smooth and elastic, about 10 minutes.  You may need to add some flour along the way.

    3.       Shape dough into smooth ball, place in a large, oiled bowl and cover with plastic wrap.  Let rise until doubled, about 1 hour.  Punch down and divide into 4 balls. Can be frozen up to 3 months. Yields 4 10-inch pizza crusts.


    Tiffany's Notes:  makes roughly 2 pounds of dough.  I use about 1 pound of dough per pizza (so my pizzas are bigger than theirs), thus I usually double this recipe.  I often use about 1 ½ C whole wheat flour and 2 cups AP flour per batch.  I usually bake the pizza at about 450.

    Pizza Sauce

    • 1 (6 ounce) can tomato paste
    • 6 fluid ounces warm water (110 degrees F/45 degrees C)
    • 3 tablespoons grated Parmesan cheese (I used the stuff out of the shaker)
    • 1 teaspoon minced garlic
    • 2 tablespoons honey
    • 1 teaspoon anchovy paste (optional) - did not use, would love to try
    • 3/4 teaspoon onion powder
    • 1/4 teaspoon dried oregano
    • 1/4 teaspoon dried marjoram
    • 1/4 teaspoon dried basil
    • 1/4 teaspoon ground black pepper
    • 1/8 teaspoon cayenne pepper (did not use - worried about spice for kids)
    • 1/8 teaspoon dried red pepper flakes
    • salt to taste (left out)
    1. In a small bowl, combine tomato paste, water, Parmesan cheese, garlic, honey, anchovy paste, onion powder, oregano, marjoram, basil, ground black pepper, cayenne pepper, red pepper flakes and salt; mix together, breaking up any clumps of cheese.
    2. Sauce should sit for 30 minutes to blend flavors; spread over pizza dough and prepare pizza as desired. 
     She has this as a recipe for 1 pizza, it worked well for the 2 that I made without having to double it.


    Sunday, November 6, 2011

    How To Make A Stock


    Making a stock is one of those things that is so super easy that you will have yourself wondering why you didn't do it before.  So many soup recipes call for a stock, usually chicken, beef or turkey.  Now you can go and buy a pre-made stock at the store; or, you can use what you have on hand.  I make my stocks ahead of time and freeze them, ready to use when I need them.

    I usually buy a rotisserie chicken every couple of weeks and once the meat has been used up, I save the bones and skin for this.  We also keep a small container of our onion tops and skins as well as garlic skins and bits of sweet peppers not used thoughout the week.  This really makes making a stock easy.

    You take your chicken bones and vegetable bits and put them into a large cooking pot.  Put just enough water in to cover everything.  Put a lid on and bring it all to a boil.  Once boiling well, reduce the heat to minimum and let simmer for about an hour.  Let cool.  Once cooled, drain the stock into a large container, ready to freeze. 

    I do the same thing with my turkey bones, just using a larger stock pot for the process and often get enough stock for 3 or more containers of stock. 

    You can make a vegetable stock as well by putting in large chunks of veggies - onions, garlic, peppers, carrots and tomatoes work well for this.

    There you go, super easy and a great way to use up everything you have on hand.

    Sunday, October 30, 2011

    Pumpkin White Chocolate Cookies


    I have been searching for a pumpkin cookie recipe that actually turns out like a cookie instead of a cake/cookie.  This is it! And with white chocolate chips to boot.  Thank you Food.com.  The real test was in my family of taste testers...they all went back for more.  Definitely a keeper.  I used fresh pumpkin in my version, but you can used canned.  To use fresh, bake the pumpkin like a squash and let cool before incorporating it.

    • 2 1/4 cups all-purpose flour
    • 1 teaspoon pumpkin pie spice
    • 1/2 teaspoon baking soda
    • 1 cup butter, softened
    • 1 1/2 cups brown sugar
    • 1 cup pumpkin puree
    • 2 large eggs
    • 1 teaspoon vanilla extract
    • 2 cups white chocolate chips

    Pre-heat the oven to 300*.  In a medium bowl mix together the flour, pumpkin pie spice and baking soda and set aside.  In a large bowl beat the butter and brown sugar together.  Mix in the pumpkin, eggs and vanilla.  Slowly add the flour mixture.  Finally, mix in the white chocolate chips.  Drop by spoonfuls onto a baking sheet (sprayed with non-stick cooking spray).  Bake for 20-25 minutes.  Makes 4 dozen.

    Saturday, October 29, 2011

    Pumpkin Pie Spice


    I wanted to make pumpkin white chocolate chip cookies today.  I was so excited about it until I read that the recipe called for pumpkin pie spice.  Seriously, that is one of those ingredients that I never buy because I don't need it often.  I usually just need a tsp or so once or twice a year.  So, I did a little googling on Food.com (one of my go to sites for recipes) and I found this.  It doesn't make a lot, just enough for what you need.  Mix the following together and store in an airtight container. 

    • 1 1/2 teaspoons ground cinnamon
    • 1/2 teaspoon ground nutmeg
    • 1/4 teaspoon ground cloves
    • 1/2 teaspoon ground ginger


    Saturday, October 22, 2011

    Banana Chocolate Chip Cookies

    As I was searching my cookie recipes last night, I couldn't believe that I hadn't posted this recipe before.  These cookies are THE cookie around our house.  If we are going to make cookies, these are the ones we make.  I have a fond attachment to them and joke that this is the cookie that hooked Jonathan to me for life, as I would send them to him in college care packages when we were dating.
    Needless to say they are fantastically delcious and don't last long in our home.  They are based on an old Mrs. Field's recipe, using a few of my own adjustments.  Enjoy!

    2 2/3 cups all purpose flour
    1/2 tsp baking soda
    1/4 tsp salt
    1 cup packed light brown sugar
    1/2 cup granulated sugar
    1 cup salted butter, softened (the trick to a really good cookie is using real butter, not margarine)
    1 egg
    1 tsp vanilla
    3/4 cup mashed banana (about 1 banana)
    2 cups chocolate chips

    Preheat the oven to 300*F.  In a medium bowl mix together the flour, baking soda and salt - set aside.  In a large bowl blend the sugars together.  Add butter and mix to make a grainy paste.  Add the egg, vanilla, and banana and mix.  Add the flour mixture and the chocolate chips.  Blend until combined - don't over mix.  Drop by tablespoons onto a cookie sheet (sprayed with non-stick cooking spray).  Bake 20-25 minutes.  Transfer to a cool surface to cool down.  Enjoy with a glass of milk on the side!

    Monday, September 26, 2011

    Curry Squash Soup

    I'm terrible at getting bowls of soup to look good in pictures. It just doesn't happen for me. So just the drawing today, but trust me, this soup is good! I make this soup at random in the sense that I just make it, I don't really take the time to measure out stuff, so the measurements are by what I think they are as opposed to really measuring it out. I love this soup for fall when squash is out at the markets. I only just realised that I've never blogged this recipe before. It is one of my staples. This time I made it, I used a buttercup squash (which is in season right now) - I've also used butternut with this recipe.

    1 tbsp butter or margarine
    1 onion, diced
    1 tbsp ginger, finely chopped
    1 tbsp or so curry powder (you can use less depending on your curry preference)
    1 squash cut into chunks - (about 6 cups?)
    4 cups chicken stock (enough to cover squash)
    1 tsp or so chicken bouillon a dash of salt

    Over med-low heat, melt the butter in a soup pot. Add the ginger and onion and saute until they are softened. Add the curry powder in. Add in the squash and the chicken stock. Make sure there is enough liquid to cover the squash. Raise the heat up to med-high to boiling. Lower heat again to simmer to allow the squash to cook and soften. Use an immersion blender to puree everything together. Taste and add bouillon and salt for flavor. Mix in. This makes a lot of soup. It's good to freeze to save for future meals or in individual packets for lunches.

    Wednesday, September 14, 2011

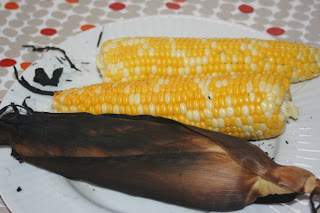
    BBQ Corn

    Foodie admission of the week. When I see people shucking their corn into the bins at the grocery store, it takes all that I have in me not to shout at them, "Stop! What are you doing? Don't you know the best way to cook corn requires the husks to still be on?!!". So far I've been restrained. This past grocery trip my 4 year old son was not as restrained. We bumped into an acquaintance who was shucking her corn as we were just bagging our unshucked to go. My 4 year old asked her, "Why are you doing that? We cook ours with the green stuff on." She looked at me in question for confirmation which led to the explanation of BBQ-ing corn. For some reason I just assumed that everyone knows about this, so I never blogged about it. But apparently everyone does not know about this, so here is the brief as I can be explanation. Put your BBQ heat to med-low. Put the corn (still in the husks) onto the grill. BBQ for 10-15 minutes, turning every so often. The greens will get dark brown and blackened. Then shuck it. You can stop there and eat, or, you can put the shucked, cooked corn back on the BBQ for a little browning of the corn. Both are delicious. Like really fantastically delicious. As in since we discovered this we have never boiled our corn on the cob again, ever! Enjoy.

    Saturday, September 3, 2011

    Cake Balls


    These big lumps are not balls of play-do. These are for lack of a better term 'Cake Ball". Kind of like Cake Pops without the lollipop stick. I made them for my son's class at the end of the school year for his birthday. (You can tell, I'm way behind at blog posting recipes over here!). The long and the short of it is that this is what I did with a bunch of frozen leftover cake (cast offs from birthday cake molding) and leftover fondant from my other son's Mickey Mouse Cake, also frozen. The kids enjoyed them and I would make them again. Very sweet and very good! This recipe is really random in not having measured ingredients, here's my best guess. 1 cake or the equivalent in leftover cake (I used about 4 cups of cake?) 1 block of cream cheese (250ml or 1 cup) - softened 1 tbsp milk marshmallow fondant (recipe here) Tear the cake into pieces and place into a large bowl. Mix with the softened cream cheese and milk. You can use your hands to really squish and blend everything in. Take bits of the cake mixture and roll into balls. Place onto a baking sheet. Cover with plastic wrap and place into a freezer overnight. The next day, roll out the fondant. Cut into strips, larger than the width of your cake balls. Place cake ball on the the end of a strip and roll up to cover with the fondant. Use your fingers to make edges meet and smooth out the surface. Keep cold until ready to serve.

    Saturday, July 2, 2011

    Canada Day Strawberry Shortcake


    Isn't that cute?  This is the second time I've used this recipe.  I found it on food.com.  The first time I made it using her directions.  This time I made my own little changes and decorated it to look like our flag. The cake part is more like a sweet biscuit than a traditional strawberry shortcake cake.  You can make this and leave the cake as is, putting whipped cream and strawberries over all of it.  Or, you can slice into two cakes, layering it with cake, whipped cream and strawberries, cake whipped cream and strawberries.  Both ways are yummy.

    1 beaten egg 
    2/3 cup milk
    1/2 cup Splenda or sugar 
    1/2 cup butter, softened (real butter is so much better than margarine in baking)
    2 cups flour 
    2 teaspoons baking powder
    1 cup whipping cream, whipped (I usually add a tbsp of sugar to sweeten it a bit)
    sliced strawberries (as many as needed)

    Preheat the oven to 450*.  In a medium sized mixing bowl beat the egg.  Add the milk and sugar and mix together.  Whip in the butter.  Add the flour and baking powder.  Mix well.  Using your hands kneed the dough for a minute.  Bake in a 9 x 9 inch pan for 15-20 minutes.  Cool.  Remove from pan.  From here you can either decorate it with the whipped cream and strawberries, or, slice it into two, then layering the cake, whipped cream and strawberries.  Enjoy!

    Wednesday, June 29, 2011

    Crab & Artichoke Dip

     Last summer we were fortunate enough to have a family vacation to BC to visit with our families.  For Canada Day my sister-in-law hosted a feast - really there is no other word to describe it.  For a fantastic appetizer she made a crab & artichoke dip that was better than most you'd get in a restaurant.  Since then, my husband has been asking me to make the same dip for us to enjoy here at home.  Not quite a year later I did.  I had a lovely chat with my s.i.l. yesterday and she gave me the recipe out of her head.  I thought I had most ingredients on hand, and I was right.  Just a few variations, which as she put it, once you have the basics, the rest is very forgiving. 

    2 cups whipped cream
    1 block cream cheese (250 ml)
    1 dollop sour cream
    1 tbsp mayo
    1 package of artificial crab meat
    1 can real crab meat
    1 cup grated hard cheese (mozzarella or cheddar)
    1/2 cup Parmesan cheese
    1 cup jarred artichokes (drained)
    few drops Worchester
    few drops lemon juice
    good shake of Old Bay Seasoning

    In a large bowl whip cream, cream cheese, sour cream and mayo all together.  Add everything else and using a hand blender, blend it all (can put it all in a food processor too).  If it is too thick you can add a little milk in to thin it out.

    Divide into pie plates, cover with foil and bake at 350* for 20 minutes.
    ***********************************************************************************
    My variation last night with what I had on hand.

    1 cup whipped cream
    1 cup whole milk (3 1/2%)
    2 blocks cream cheese
    1 tbsp mayo
    1 package artificial crab meat
    1 can real crab meat
    1 cup grated cheddar
    1 cup jarred artichokes (drained)
    1/2 cup chopped green onion
    few drops Worchester
    few drops lemon juice
    few drops hot sauce
    salt and pepper to taste

    Follow mixing directions as above.  I baked everything in a large covered casserole dish together at 425* for 30 minutes (I have a slow oven).

    Both were delicious.


     My Sister-in-law's crab dip at last year's Canada Day family gathering.


    My husband with his sister in her kitchen.

    Saturday, June 25, 2011

    Sliders


    You see sliders everywhere now. They are so popular and it's no wonder. They are tasty little burgers. And they are a great size if you have kids. I'd like to thank Donna from My Tasty Treasures for posting her technique of making these burgers. Mine are made the same way, but I have a different recipe for my burger part.

    2 pounds ground beef
    1 onion - chopped finely
    1/2 cup bread crumbs
    1 tbsp Dijon mustard
    salt and pepper to taste
    16 cheese slices
    16 mini rolls - I use dinner rolls and they work well, but you can use whatever
    Ketchup
    Mayonnaise

    Heat oven to 425* (my oven is not hot so 425* works well for us, probably 350* would do well for a hotter oven).
    Mix ground beef, chopped onion, bread crumbs, Dijon, salt and pepper in a large bowl. Mix everything in well (one of those times you want to use your (clean) hands for mixing).
    Put the beef mixture on a baking sheet and press it flat, right out to the corners so it covers the sheet completely.
    Bake for about 20 minutes.
    Drain the grease by tipping the tray slightly over your grease catcher (coffee can or whatever you use). Make sure to hold on to the beef with an oven mitt to keep it from sliding off the tray. The beef will have shrunk a bit in size.
    Spread the cheese slices over the beef to cover it completely.
    (Here's the trust me, it sounds tricky but it makes sense part) Put the tops of the buns face down on the beef/cheese, leaving no gaps between buns.
    Then, put the bottoms of the buns on top of the tops, face UP!
    Put the baking sheet back into the oven for a few minutes to melt the cheese and heat the buns.
    Remove from the oven.
    Get the mayo and ketchup ready. As you remove each bun bottom, spread a little mayo and squirt a little ketchup on each. Set aside on a plate for a few minutes.
    Take a knife and cut out each burger on the tray. You basically have to just run it down and across in between each burger. Use a spatula to lift each burger out and place onto a bottom part. That's it. It sounds trickier than it actually is. (Check out Donna's site for pictures if you need them). Serve with onion rings or crispy fries (or both) and a homemade milkshake for extra goodness!

    Wednesday, June 22, 2011

    X-Wing Cake

    My son started planning his 7th birthday party slightly before his 6th birthday party happened. His 6th birthday had a superhero theme with a fantastic Spider-Man cake, one of my favorite cakes I'd done. For his 7th he wanted Star Wars. I started planning an R2 D2 cake. I thought about a Millennium Falcon. Nope, he wanted an X-Wing. Really? Does he think I'm Cake Boss Buddy? He would do an amazing one. Me? My skills are limited. I couldn't quite figure out how to do the X wings, so they are closed on this one.
    The body of the cake was made with a 9x12 pan, then cutting out the shape. The wings were made in 2 small bread pans (one recipe split into 2) and then cutting the shape. The cake is covered in vanilla icing. I then used a combination of licorace, ju-jubes, chocolates and oreo straws to make the decorative features. I know it isn't my best cake (that would be my other son's Mickey Mouse Clubhouse cake) but this worked and I was pleased with it.

    Monday, June 20, 2011

    Squash Pancakes


    Pancakes once were a regular feature in our home and I still like to make them as much as I can. The fantastic thing about pancakes and a picky eater in the house (mine is 4) is that you can hide a lot of different fruits and veggies in the batter. This time, the veggie was squash. My kids loved them. My picky eater ate 3 or 4 of them the first morning. They are fantastic re-heated the next day too. I used some previously cooked butternut squash in the batter, making the batter more squash than anything else.

    1 egg
    1/2 cup applesauce
    2 cups flour
    1 cup milk
    1 tbsp brown sugar
    3 tsp baking powder
    1/4 tsp salt
    1 tsp cinnimon
    2 cups squash (guestimate) - previously cooked and mashed well

    Mix everything together.  Heat the griddle or frying pan.  Spray with non-stick spray.  Pour 1/4 batter at a time onto the griddle.  (you can also add Mickey Mouse ears with a little extra batter for fun).  Let cook through on one side before flipping to cook onto the other.  Serve with butter and syrup.

    Tuesday, May 31, 2011

    Pizza Biscuits

    My 6 year old calls these pizza pucks, my 4 year old just calls them yummy. This is a very easy twist on baking powder biscuits that helps me get a little more meat into my kids diets.

    2 Cups Flour
    1 tbsp sugar
    3 tsp baking powder
    1 tsp salt
    1/2 cup butter or margarine
    1/2 cup chopped pepperoni (I just used one 100 gram pepperoni stick)
    1/2 cup grated cheddar
    3/4 cup milk

    Pre-heat oven to 450*
    Mix the dry ingredients together. Use a pastry cutter to add in the margarine until it's really nice a crumbly looking. Add the pepperoni and cheese. Stir in the milk (dough will be quite sticky).
    Flour a flat surface and kneed the dough until soft and workable (flour your hands really well too for this). Roll out about 1/2 inch thick. Use a circle cutter (I use one of my kids plastic cups, about 2'' in diameter) to cut out the biscuits. Place on non-stick sprayed sheet and bake for 10-12 minutes. This recipe makes about 16 biscuits.

    Sunday, May 29, 2011

    Sheep Cupcakes


    Aren't these cute! This was my craft idea for last night's messy church at my church. Messy church is a once a month event that we have for families. Each "Messy"
    involves a craft, an interactive lesson and dinner for families. Last night's theme was "The Good Shepherd knows his sheep". I knew we hadn't had a food craft in a while and have never done cupcakes, so I googled sheep cupcakes to see what I could find. I found the idea for these on the Food Network's Site. Their cupcakes are slightly different than the ones we did. You can see theirs here. We couldn't quite find all of the decorating ingredients that they used (the candy eyes and the gumdrop noses) so we improvised and used mini M&M's. I also didn't make their cupcake recipe so I don't know what that part tastes like. I did make their icing, but had to abandon it as it was too thick and tearing the cupcakes apart. Fortunately, I discovered this as I was making the sample 45 minutes before the event started and had time to head out to the store and pick up some ready made. The ready made worked well and was easy for the kids to use. The kids and parents really loved this craft. And that is what I would recommend it for, a craft. It is very time consuming - unless you are the kind of person who loves to spend all afternoon decorating cupcakes like this.

    How to make:

    Make the cupcakes first, try out the foodnetwork.com recipe, your favorite recipe or cheat like me and use a box mix - let cupcakes cool.

    For decorating:
    -frosting
    -marshmallows (1 per cupcake)
    -mini marshmallows (24-30 per cupcake)
    -mini M&M's (3 per cupcake)
    -purple mini jellybeans (4 per cupcake)
    -pink mini jellybeans (2 per cupcake)
    -licorice shoelaces (cut into 1cm and 3cm pieces - 1 each per cupcake)

    Frost the cupcake. Stick a large marshmallow on top to be the sheep's body. Use the frosting like glue for the rest of the stick on ingredients, putting the frosting on it first and then sticking on. Start with the Mini M&M's for eyes and nose. Use the 1 cm licorice shoelace for the mouth. Start at the bottom and work your way up and around with the mini marshmallows to make the sheep's wool. Use the 4 purple jellybeans for feet and the pink ones for ears. Take the 3cm licorice shoelace, curl it and stick it on for a tail. So cute!

    Friday, May 13, 2011

    Sugar Cookie Icing


    This week my husband and I celebrated our 9th Wedding Anniversary. These cookies were my anniversary gift to him. These are no ordinary cookies. These are our wedding cookies. Cookies were a significant part of our courtship. As such our wedding gift to our guests were these fantastic cookies (you know instead of mints, or whatever other token gift is on the reception place setting). A friend of my mom's (Lori) did all the baking for our wedding. She made these cookies, which my husband declared the best cookies he had ever had. They were 2 sugar cookies, iced and in the middle sticking them together was a little bit of jam.
    This past Valentine's Day I made sugar cookies with cookie icing for the first time. Sugar cookies I had made lots before, the icing was new to me. As he ate them he told me that this was it, these were the cookies similar to what was at our wedding. So for our anniversary, I made the cookies, complete with the jam filling as a gift to him. I did the icing here yellow as yellow was our wedding theme colour.
    Here is the recipe for Sugar Cookie Icing. It is so easy to make. I recommend putting the icing on with a butter knife or icing spreader, I found a pastry brush was too tricky to get the icing to spread just right.

    1 cup icing sugar
    2 teaspoons milk
    2 teaspoons light corn syrup*
    1/4 teaspoon almond extract**
    assorted food coloring

    *Can use honey or maple syrup in place of corn syrup
    **Can use any flavor extract, I used vanilla

    In a small bowl, stir together icing sugar and milk until smooth. Beat in corn syrup and almond extract until icing is smooth and glossy. If icing is too thick, add more corn syrup.
    Divide into separate bowls, and add food colorings to each to desired intensity. Dip cookies, or paint them with a brush (or spread with a butter knife).

    Thursday, April 28, 2011

    Banana Chocolate Chip Muffins


    I love these muffins. They are one of my favorite baking recipes. Not only are they delicious, but they are full of a secret ingredient. The secret to these fabulous muffins? Cauliflower. That's right. These are quite healthy and a sneaky way for me to get some veggies into my picky eater. I originally found this recipe at Once Upon a Gourmet Gin. I decided it was time to post it myself as I've adapted it a little. She uses self-rising flour, something I never have in the house. It's very easy to find a substitute. The secret formula is for each 1 cup of self rising flour, use 1 cup all purpose flour plus 1 1/2 tsp baking powder and 1/2 tsp salt. That's it.

    Here's my adapted recipe.

    2 1/2 cups all purpose flour
    3 1/2 tsp baking powder
    1 1/2 tsp salt
    1/2 tsp baking soda
    1/2 cup sugar
    2 eggs, lightly beaten
    1/2 cup milk
    1/4 cup unsalted butter, melted
    2 very ripe bananas, mashed
    1 1/2 cups steamed fresh cauliflower, mashed and cooled
    1 cup semisweet chocolate chips


    Preheat oven to 400*. Spray muffin tin with non-stick spray (or line with muffin cups) In a large mixing bowl sift together the dry ingredients (1st 5). In a mixing bowl stir together the eggs, milk, melted butter, mashed bananas and cauliflower. All to the flour mixture and stir until just moistened. Add the chocolate chips. Spoon batter into the prepared muffin cups, filling them 2/3 full. Bake approximately 15-20 minutes. Cool 5 minutes and remove from pan. ENJOY!

    Wednesday, April 13, 2011

    My Brother, the beer expert!

    My brother has published his first guest post on a city blog. The topic is beer. (And not in a bad way). He knows a lot about different kinds of beer (and other alcoholic beverages) from his job at a liquor store. It's well worth reading. Check it out here.

    Saturday, April 9, 2011

    Peanut Butter and Honey Tofu


    During my Lenten vegetarian journey I've been making a lot of my favorite chicken dishes using tofu in place of chicken. This dish was a take on one I remembered from when I boarded with a vegetarian family back in university. I remembered that they would make peanut butter tofu with soy sauce as a stir fry quite a bit. I used the peanut butter part as an inspiration for this dish. Here's what you need to know about cooking with tofu. Tofu comes in a variety of firmness degrees. If you want to stir fry it, the firmer the better. Firm to extra-firm if possible. Medium or soft will just fall to mush. Also tofu takes on flavor really well so marinate it for at least 1/2 hour before cooking. Tofu on its own is pretty bland. I remember the university residence's 'veggie' burger way back when was just a slab of plain tofu between a bun. That is just wrong. Fortunately vegetarian cooking has come a long way in North America since then.

    I didn't measure any of this, I just played as I went along. The result was so tasty that I made it again within a week (a true sign I've made something right). Slice the tofu into cubes. I cut 1/4 a brick as I was the only one eating it. You could do a whole brick if you are serving to others. Put the tofu into a small bowl and add some hoisin sauce (I used about a tablespoon or so). Mix it up so the tofu is coated. Put in the refrigerator to marinate it for at least 1/2 hour.
    Heat a frying pan to medium/high heat with a little bit of cooking oil, or non-stick spray. Add the tofu to the pan plus a tablespoon or 2 of peanut butter and a tablespoon or 2 of honey. Mix in well. Stir fry for a few minutes until everything is heated through. Serve with rice or noodles. I served this along with a veggie stir fry with noodles. As a side note, I did the exact same thing to some chicken meat for the rest of my family. They liked it. I haven't had the chicken version yet, I'll let you know after lent.

    Saturday, April 2, 2011

    Lentil and Mushroom Loaf with Savory Potato Filling


    When my college roommate Ang heard I was going vegetarian for Lent, she remembered this dish I made back in the day and asked for a copy of it. I'll admit I haven't made this in years, but I remember loving it. Like all good recipes it comes with a back story. I ate vegetarian for about 10 years. When I boarded in college I lived with a vegetarian family for 2 years. They had some fantastic cookbooks. This recipe came from Vegetarian Celebrations. This book was dedicated to finding delicious holiday vegetarian dishes. This recipe is one I would often make at Christmas and Thanksgiving in lieu of Turkey. When I started cooking on my own I wanted a copy of this book. Unfortunately by then it was no longer in print. One bookstore was able to find me a copy an order it in (remember this was before the days of Amazon) and I'm glad to have this book in my collection now.

    Shell:

    1 cup raw lentils
    1 tbsp canola oil
    2 cloves minced garlic
    6 oz white mushrooms
    5 oz thawed frozen spinach
    1 tbsp soy sauce or tamari
    2 tbsp wheat germ
    freshly ground pepper to taste
    dash nutmeg
    1 cup firmly packed grated Stilton or Gruyere Cheese (or sub. mozzarella style soy cheese)

    filling:
    1 tbsp canola oil
    1 cup chopped onion
    1/4 cup dry breadcrumbs
    1 cup coarsely mashed potato (from about 1 medium cooked and peeled potato)
    1/2 tsp each: seasoned salt, dried thyme, and dried basil
    freshly ground pepper to taste
    curly parsley for garnish

    Rinse and sort lentils. Combine in a heavy saucepan with 4 cups water. Bring to a boil, then lower heat and simmer, covered, until the lentils are tender, about 45 minutes. Drain.
    Preheat the oven to 350*
    Heat the oil in a large skillet. Add the garlic and mushrooms and saute over medium heat. stirring until the mushrooms are wilted. Stir in spinach, lentils, soy sauce and wheat germ. Grind in some pepper and add the nutmeg. Cook, stirring unil the mixture is heated through, then stil in the cheese.
    Lightly oil a 9x5x3 inch loaf pan. Pour in about 2/3 of the lentil mixture. Press some of the mixture up the sides of the pan to create a shell about 1/2 inch thick. Transfer the remaining lentil mixture to a small bowl and reserve until needed.
    Rinse the skillet and heat the oil. Add the onion and saute until golden brown. Add the remaining filling ingredients and saute, stirring occasionally for 5 minutes. Transfer into the lentil shell, then cover the top with the reserved lentil mixture. Bake for 40-45 minutes, or until the top is crusty.
    Remove from the oven and let the loaf stand for 15 minutes. Slide a spatula or knife around the edges to loosen it. Cut slices and arrange them on a serving dish, Garnish with parsley and serve.

    Wednesday, March 30, 2011

    Pimp my Pizza

    Okay, I cannot believe I just used that as a title of one of my blog posts. *LOL* It just popped in my head so there you go. Laugh with me if you will.
    So this is about pizza. I love having an easy meal to pop in the oven each week. We have a regular pizza night. I don't order in. I buy frozen. You can get frozen pretty cheap, and much less oily than take out. I get them 3 in a box at Costco for about $12. My kids like plain cheese, but I like my pizza more interesting than that. I really don't like frozen pizzas that already have veggies on them. I'm sorry, but they just don't taste very good. What we do is bake one plain for the kids and then add to the second one for us.
    Last night's was soooo delicious. I grated on a little cheddar. Then added some chopped red onion, red pepper, mushrooms and tomato. Finished it up with some crumbled feta and baked it according to the box directions.
    The possibilities are endless for pizza. Add as much or as little as you like. Sometimes we just add a little sliced onion and few tomatoes and that does it. Just gives it a little bit extra to make it that much better.


    Frozen pizza as is.

    Frozen pizza plus!

    Sunday, March 27, 2011

    Vegetarian Chili

    Sorry no picture, I forgot! But this recipe is well worth remembering. I found it on food.com. It is very delicious and filling. This was also the tale of making sure you plug in the crock pot - I was sure I did and was kicking to find out it wasn't plugged in - only to find out my husband had unplugged it to plug in the kettle, forgetting to plug the crock pot back in. That happened not once, but twice with this chili! All was good though as I adjusted from cooking on low to cooking on high. It all worked out!

    1 (11 ounce) can condensed black bean soup (or canned black beans in juice) - I used the canned black beans
    1 (15 ounce) can kidney beans, drained and rinsed
    1 (15 ounce) can garbanzo beans (chickpeas), drained and rinsed
    1 (16 ounce) can vegetarian baked beans (in Canada beans in tomato sauce)
    1 (14 1/2 ounce) can chopped tomato puree (I used a hand blend to puree a 28 ounce can of tomatoes)
    1 (15 ounce) can whole kernel corn, drained (I don't buy canned corn so I used the equivalent in frozen corn - 2 cups)
    1 onion, chopped
    1 green bell pepper, chopped
    2 zucchini, chopped
    2 stalks celery, chopped
    2 garlic cloves, chopped
    1 (4 ounce) can diced chilies
    1 -2 jalapeno peppers, chopped (depending on how much heat you want)
    1 tablespoon chili powder
    2 teaspoons cumin
    1 tablespoon dried parsley
    1 tablespoon dried oregano
    1 tablespoon dried basil
    1 tablespoon cilantro (optional)


    In a saucepan, saute the onion, bell pepper, zucchini, and celery for about 5 minutes. In a slow cooker, combine black beans, kidney beans, garbanzo beans, baked beans, tomatoes, corn, onion, bell pepper, zucchini, jalapeno, chilies, and celery.
    Season with garlic, chili powder, cumin, parsley, oregano, basil (and cilantro if using). Cook for about 6 hours on low.

    Wednesday, March 16, 2011

    Beer and Butter Tarts

    Sounds like a great title eh? Yes, my Canadian is showing a bit here.

    About a year or so ago, my mom was hosting her book club. The selection of the month was Welcome Home, Stories in Small Town Canada by Stuart McLean (great book if you have a chance to check it out). As hostess for her book club she needed a menu to offer. She wanted all-Canadian food to match the book and was looking for ideas. My first thoughts were bacon and bannock. Surely we have more to Canadian food than that. Once we thought about it the ideas kept coming. Nanaimo Bars, poutine, cherry/cream cheese finger sandwiches, smoked salmon, beaver tails, Malapeque Oysters...now we were on a roll. I don't remember what her final menu included, but I know we had fun coming up with the ideas.

    Last week I noticed a button on another foodies blog for Beer and Butter Tarts. I had to check it out. I'm glad I did. Beer and Butter Tarts is an aggregator for Canadian food blogs. I'm proud to say that Whatcha Eatin' is now a part of that venture. Canadians have a great love of food and being such a wide-spread, multicultural country there are all sorts of great foodies out there. Check Beer and Butter Tarts out here or on my sidebar button and enjoy!

    Friday, March 11, 2011

    Going Vegetarian for Lent

    This past Wednesday marked the beginning of the season of Lent.  Lent is the time observed in the Christian calendar as the 40 days before Easter (relating to the 40 days Jesus spent in the wilderness after His baptism).  It has been traditionally observed as a time of prayer and fasting.  I've chosen to observe Lent in various ways in the past.  This year I felt called to give up meat.  I had considered a full Daniel fast of no meat, no dairy and no sweets, but as I'm still nursing my daughter I didn't want to affect my milk supply.  I'm not new to a vegetarian diet.  I was a vegetarian from the time I was 15 to 24.  I've learned a lot about food and cooking since then.  I've also developed a love of meat so this should be a good practice of self-denial for me.

    I've planned out my first 2 weeks of meal ideas, but I'd love to have suggestions for other dishes to try over the next month and a half. If you have a great idea for a vegetarian dish, please share in the Linky below. I love trying new dishes and can't wait to see all of your fabulous recipes!


    Current Vegetarian Meal Ideas

    Veg. Chili
    Spaghetti
    Spanikopita with Greek Salad
    Red Lentil Soup
    Chinese Mushroom Stir Fry
    Sweet Potato Curry
    Vegetable Jalfreezi
    Aloo Ghobi
    Veg Baked Bean and Rice
    Greek Pizza

    Wednesday, March 9, 2011

    Mickey Mouse Clubhouse Cake

    Here it is, my son Jeremy's 4th birthday cake!  This is my first cake using marshmallow fondant.  I am so pleased with the results!  I have stayed away from fondant in the past because let's face it, it looks pretty but tastes disgusting!  Marshmallow fondant is different.  It looks great and tastes nice and sweet, the way icing should taste.  I used a lot of icing dye to get the colours just right.  It takes a while to really kneed it into the icing so it has an even consistancy (especially red, the blues and yellow wasn't as much work).  The figures I picked up as a set at the Disney store.  If I keep making cakes like this, I may have to invest in some more cookie cutters (I could use a set of letters anyway).  I used the fondant recipe found here with no adjustments needed.

    Saturday, February 19, 2011

    Tikka Kebabs


    This was a fantastic recent find of mine.  I have a couple of amazing cookbooks by Jeffrey Alford and Naomi Duguid.  They are a couple who travels in different parts of the world (mostly Asia) and learn to cook in villages by the locals.  They have the most wonderful recipes in beautiful books.  This recipe came from Mangoes and Curry Leaves:Culinary Travels Through the Great Subcontinent.  It just so happened that this book was the end book on my cookbook shelf.  The back cover picture kept staring at me calling my name until I became determined to find out just what that dish was.  This is it.  As my husband said, this was the best marinade he's ever had.  And this is a man who is serious about eating good meat!
    The recipe is supposed to be for lamb kebabs (not much in the way of beef recipes in India) but seeing as we do eat beef here and good lamb is harder to come by, I used beef instead of lamb when we did these up.  We've had them twice in the past 2 weeks, once without the yogurt in the marinade as I didn't have any on hand and once with.  Both versions were good.  I even managed to convince my husband to BBQ them for me in the snow - isn't he great?


    Here's the recipe:

    1 1/2 to 2 pounds boneless lamb shoulder (I used stewing beef in substitution)
    1/2 cup plain yogurt
    2 tsp minced garlic (or garlic mashed to a paste)
    2 tbsp fresh lemon juice
    1 tsp ground coriander
    1 tbsp vegetable oil
    2 tsp salt
    1/4-1/2 tsp cayenne
    1/4-1/2 tsp ground black pepper (optional)
    lime or lemon wedges

    Trim the meat of any excess fat and cut into 3/4 inch cubes.  Set aside in a large bowl.
    In a small bowl, mix together the yogurt, garlic, lemon juice, coriander. oil, 1 tsp of the salt, the cayenne, and black pepper.  Pour over the meat.  Stir with a spoon or your hands to get all the meat surfaces coated with marinade.  Cover  and refrigerate for at least 2 hours or for as long as 12 hours. 
    Thread the meat onto metal skewers, without pressing them tightly together, grill over moderate heat, turning occasionally, until browned on the outside and pale pink in the centre (or all the way through if you prefer).
    Just before serving, sprinkle about 1 tsp of salt over the meat.  Put out lime or lemon wedges so guests can squeeze on fresh juice.
    Serve with flatbread.

    A few Valentine's Pics


     It's a good thing that I took a picture of these sugar cookies when I did, they didn't last out the day!

    Our Valentine's feast went well.  The salad was an avocado one that I don't think I'd make again.  It was slightly too oily.  I liked all the ingredients though (avocado, tomato, feta, corn), maybe next time I'd up the amount of lime juice and hold back a bit on the olive oil.  The steak I did in Montreal Steak Spice and fried it in the cast iron skillet with the onions.  It was perfect!.  The shrimp were cooked in garlic butter and also came out perfect (don't you like the hearts I made with the shrimp?)

    The potatoes were the find of the evening.  I tossed them in a little olive oil with herbes de provence and roasted them for over an hour in a baking dish (turning occasionally).  So yummy!  We did follow up with strawberries in chocolate, but no picture for that.  Hope your V-Day feast was just as yummy!

    Saturday, February 12, 2011

    Plans for Valentine's Day

    Valentine's Day is one of those holiday/non-holidays that I can take or leave.  When I was single, I spent many a Valentine's Day dressed in black with my other single girlfriends, treating ourselves out to a nice dinner and then having a fantastic time letting guys buy us drinks and dancing the night away.
    When my husband and I began dating I made him cookies for our first Valentine's Day.  He loved that.  He's a sucker for homemade gifts.  The cookie theme stuck throughout our courtship (including me express posting packages of them to him when he was in college across country).  Incidentally, we had cookies for guest treats at our wedding instead of the traditional party mints to keep with the theme.
    We've had a variety or Valentine's dates over the years.  One of the most memorable we spent at a cooking class that was advertised as a romantic night of cooking for two.  There were other couples there ready to learn and feast with this great chef.  The funny part (and unromantic part) was the lone single woman who kept inturrupting the chef and the company host who insisted that the chef portion out small to us.  She was also a rather brash personality that just did not add to the ambiance of it.  We ended up picking ourselves up a burger afterwards so we wouldn't go hungry.  Ahh well, we tried.
    This year we are on a rather strict budget so no going out date.  We have become experts at the at home date, once the kids are in bed. 
    Kids see Valentines Day as something special too.  What kid doesn't get excited about all the cards being exchanged with friends.  Never mind all the heart cut-outs and small school celebration attached to it.  Anything to break the routine of day to day school.
    I like to do a little something for my kids on Valentines day - nothing too big (it's not a second Christmas) but a little treat because I love them.  I went to a card-making craft session on Friday and make everyone some cute Valentines.  And I've stocked up on Hershey's kisses and cinnamon hearts to have on the table on Monday.  Do you want to see the cute jam heart breakfast sandwiches I'll be making?  I got this idea on Chatelaine's website here.  Cute eh?
    What I didn't realize until today is that I do not have heart shaped cookie cutters of my own.  That's just not right!  I did pick some up at the dollar store this afternoon.  I'm planning on making some sugar cookies with my boys tomorrow.  Always a great treat.
    Here's my favorite sugar cookie recipe.  It is from Mrs. Field's Best Cookie Book Ever.

    2 cups all-purpose flour
    1/4 tsp salt
    3/4 cup salted butter, softened
    3/4 cup sugar
    1 egg
    1 tsp vanilla extract

    Pre-heat oven to 325*.  In a medium bowl, combine flour and salt with a whisk, set aside.  In a large bowl, cream the butter and sugar with an electric mixer on medium speed.  Add the egg and vanilla, beat until well mixed.  Add the flour mixture, Blend on a low speed just until combined, don't overmix.  Gather the dough into a ball, flatten the ball into a disk and wrap tightly in plastic wrap.  Refrigerate one hour until firm.
    On a floured surface, roll out the dough to about 1/4 inch thick.  Use cookie cutters to cut the dough into fun shapes.  Bake for 13-15 minutes.


    And for our Valentine's dinner - here's the planned menu (shh, don't tell my husband, it's a surprise for him!) - Basically, it's his favorite meal.  Avacado salad, Shrimp in garlic butter, steak, baby potatoes followed with strawberries dipped in chocolate.  Sounds good, doesn't it?
    What kind of plans do you have for your Valentine's Day this year?

    Tuesday, February 1, 2011

    Shepherd's Pie

    I love this recipe for a cold winter's night.  It is the tastiest shepherd's pie I've ever had.  I use Jean Pare's recipe from Cooking for Two, but I double it each time.  Here are the measurements for a double recipe (which feeds my family of 5 nicely).  You can of course halve it to make the smaller 'for 2' dish.

    2 tsp cooking oil
    1 lb lean ground beef
    2 1/2 cups chopped onion

    2/3 cup water
    4 tsp beef bouillon powder
    2 medium carrots, sliced thinly or diced (I dice them)
    1/4 tsp garlic powder
    1/2 tsp Worcestershire sauce
    sprinkle each of salt and pepper

    2/3 cup frozen peas

    3 cups cooked mashed potatoes
    2 tbsp milk (to mix into the mashed potato)
    sprinkle of salt (to mix into the mashed potato)
    sprinkle of paprika

    Heat cooking oil in frying pan.  Add ground beef and onion.  Scramble-fry until beef is browned and onion is soft.  Drain.

    Combine the next 7 ingredients in saucepan.  Stir.  Heat to boiling.  Cook slowly until carrot is tender.  Add peas.  Cook for 2-3 minutes.  Add ground beef mixture.  Stir.  Pack into a casserole dish. 

    Cover with mashed potato.  Sprinkle with paprika.  Bake, uncovered in 350* oven for about 30 minutes, until very hot.


    Friday, January 28, 2011

    Homemade Ravioli and Tortellini- 3 different fillings


    First, I'm going to admit that this was supposed to be just homemade ravioli. Unfortunately for me, I had a little lesson in homemade pasta storage. My beef raviolis stuck together overnight and broke apart a little when I pulled them apart. Fortunately, I re-shaped them into tortellinis and they were delicious. My cooking counterpart was much more clever than I, putting a liner of plastic wrap down in between each layer of raviolis in her container. She had no problems :o)

    This is my second go at making pasta. A friend has a pasta roller attachment to her Kitchen Aid (2 things I would love to have). She kindly brought it over and we had a great morning of pasta making. We made 3 different kinds of fillings between the two of us. All turned out. All were yummy.

    Here's a few step by step pictures of laying out the ravioli.


    Use a pasta cutter (or pizza cutter like we did) - spoon a small amount onto the strip, about 2 inches apart. Brush an egg wash around the filling to help seal it later.

    Put the matching half over top. Press down around the filling to seal (press out air bubbles). Use your cutter to divide. Press the seals again around the edges.

    My friend's beautiful pasta storage job.

    Here are the recipes:

    Pasta
    2 cups flour (we did one batch with 1 1/2 cups white and 1/2 cup whole wheat and then a second batch that was 1 cup white and 1 cup whole wheat, both worked)
    3 eggs
    1 tsp water
    1 tsp olive oil
    1 tsp salt

    Blend all ingredients in a food processor until the mixture begins to form a ball. Kneed the dough for a few minutes, sprinkling extra flour as necessary so the dough is not sticky. Cut dough into 4 pieces. Cover 3 with plastic wrap while working with the first one. Flatten out a little by hand or rolling pin and follow your pasta roller's instructions to create the kind of pasta you desire.

    Beef and Cheese Filling
    ½ lb Ground Beef
    3 oz Parmesan Cheese (I omitted, she used, both were good)
    ¼ Onion
    2 – 3 cloves Garlic (I used 3, she used 1, again both were good)
    1 Egg
    some Fresh Oregano
    some Fresh Parsley
    (I didn't have fresh herbs on hand, I used some Italian seasoning, plus some dried oregano and dried parsley)
    1. Chop and mince garlic and onion.
    2. Grate parmesan cheese
    3. Brown ground beef.
    4. Add in chopped garlic and onion and finish browning beef.
    5. Drain browned ground beef, garlic and onion in colander.
    6. Chop or process fresh oregano and parsley.
    7. Add oregano and parsley to browned ground beef, garlic and onion.
    8. Beat or whisk an egg and stir into mixture.
    *recipe courtesy of http://www.culinarysavant.com

    Artichoke and Cream Cheese Filling


    2 green onions, chopped
    8 artichoke hearts, cut into quarters (I used marinated)
    1 1/2 tbsp butter 
    salt & freshly ground black pepper  
    1 egg, beaten
    3/4 cup cream cheese


    Melt butter in a small saucepan over medium heat.  Add green onions and artichoke hearts.  Sprinkle with salt and pepper. Saute over medium-low heat for about 15 minutes

    Place into a bowl and puree with a hand blender (or put into a food processor and do the same).  Add cream cheese and egg.  Continue to blend everything together.

     
    Butternut Squash and Cheese Filling

    1 1/2 C baked butternut squash
    1/2 cup strained ricotta cheese
    1/4 cup Parmesan cheese
    3/4 tsp salt
    1/4 tsp pepper
    1/4 tsp nutmeg

    Blend all ingredients together

    My friend served this one the following way: "sautéed shallots in a lot of butter, tossing in chopped walnuts and lots of sage at the end for a few minutes and then poured it over the squash ravioli as a topping"  She said is was delicious.


    Saturday, January 22, 2011

    Tim Horton's Breakfast Sandwich - Copycat recipe

    I've posted before how much I love the Tim Horton's Breakfast sandwich.  I order the egg and cheese on a tea biscuit.  It is such a yummy way to start the day (especially with French Vanilla coffee to accompany it).  I've never quite figured out how to do the egg part.  It completely eluded me.  At home, I've been making a cross between an Egg McMuffin and a Tim Horton's breakfast sandwich for a few years now.  Today, I figured it out.  Now that I know what I'm doing, it's so easy!  I'll let you in on the secret.

    Biscuit Recipe

    2 Cups Flour
    1 tbsp sugar
    3 tsp baking powder
    1 tsp salt
    1/2 cup butter or margarine
    1/2 tsp onion powder
    3/4 cup milk

    Pre-heat oven to 450*
    Mix all the dry ingredients together. Use a pastry cutter to add in the margarine until it's really nice a crumbly looking. Stir in the milk (dough will be quite sticky).
    Flour a flat surface and kneed the dough until soft and workable (flour your hands really well too for this). Roll out about 1/2 inch thick. Use a circle cutter (I use one of my kids plastic cups, about 2'' in diameter) to cut out the biscuits. Place on non-stick sprayed sheet and bake for 10-12 minutes. I err on the side of less time to avoid burning and keep the baking sheet on a higher up rack. This recipe makes a dozen biscuits.

    The Egg part

    Spray a coffee cup with non-stick spray.  Crack an egg into it.  Mix well.  Add a little salt, pepper and parsley flakes to season.  Mix.  Cook in a microwave for 1 minute on high heat.

    Putting the Sandwich together

    Cut one biscuit in half.  Lay a slice of cheese* on the bottom.  Put the egg on top of the cheese.  Top with the top half of the biscuit.  Enjoy!

    *Processed cheese slices are what they use at Tim's.  Now that you know what to do at home you can mix it up a bit with different cheeses.  Add a slice of ham or bacon if you like. 

    Wednesday, January 19, 2011

    Super-Easy Banana Muffins

    If you have been reading my blog for a while, you may remember that my middle child is really picky about fruits and vegetables.  He seems to only be able to eat them when they are in another form, so I'm always on the search for ways to get them in him.  I found this recipe on food.com.  It is the easiest banana muffin recipe ever!  Very tasty and moist.  And my son loved them, he ate 3 the first day we made them.  *I know these aren't the healthiest option out there, but man are they good!

    1 cup Miracle Whip (I used Hellman's Mayonnaise instead)
    1 cup sugar
    2 cups flour
    4 bananas (mashed with a fork)
    1 tsp baking soda

    Hand mix ingredients together.  Fill muffin tins with batter.  Bake at 325 for about 25 minutes (or until golden and a toothpick inserted comes out clean).  Makes 12 muffins.

    Sunday, January 16, 2011

    Daisy flower birthday cake

    My darling baby girl turned one today!  Here's the cake I made for her.  I have to say it's fun to make a cake for a little girl.  My husband thinks this is my best cake to date.  I don't know if that's true, but I think it's pretty cute :o)

    Monday, January 10, 2011

    Cajun Bagel Crisps


    These were a super tasty find in my Christmas Gifts from the Kitchen book this year (Jean Pare, Company's Coming).  They aren't just for Christmas snacking, they will do well year round.  Easy to make and yummy to snack on.  We munched on these plain, with cream cheese and with cream cheese and smoked salmon.  All good!

    2 large bagels (they suggest trying a savory flavour, but we just used plain)

    1/4 cup butter or margarine, melted
    2 tsp chili powder
    1/2 tsp dried oregano
    1/2 tsp dried basil
    1/2 tsp garlic powder
    1/2 tsp onion powder
    1/4 tsp cayenne pepper

    2 tbsp Parmesan cheese, grated

    Cut bagels in half crosswise.  Cut each half into 1/8 (3 mm) half-moon slices.  Arrange in a single layer on greased baking sheets (I just sprayed mine with Pam). 

    Combine the next 7 ingredients in a small bowl.  Brush both sides of the bagel slices with the margarine mixture.

    Sprinkle with Parmesan cheese.  Bake in 400* oven for 10 to 12 minutes until golden.  Cool.  Makes about 2 1/2 dozen crisps.